Woolly Fobs finishing tutorial

March 06, 2020

woolly fobs finishing tutorial for cross stitch by october house fiber arts

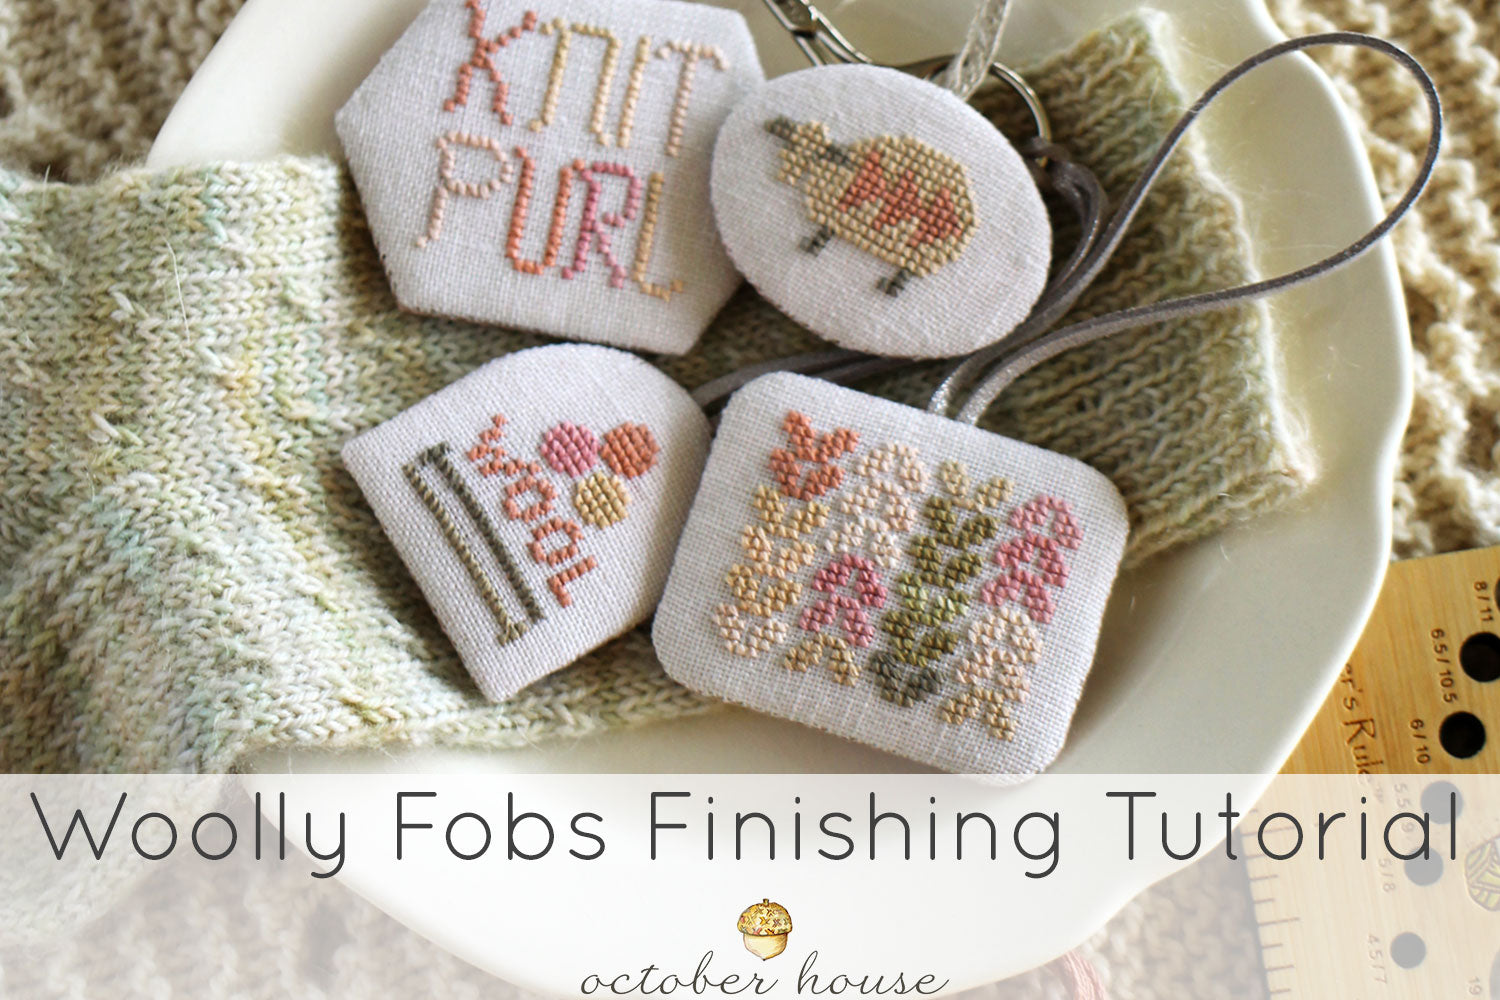
Our little Woolly Fobs are the perfect accessory for your scissors! They also make a great floss ring "doodah". 

If you're worried about how to finish these little cuties, look no further! Our easy tutorial will walk you through each step.

 SUPPLIES

  • 4 stitched pieces
  • Thin cardboard, such as comic book backing board
  • Pen or pencil
  • Thin cotton batting
  • Cotton quilting fabric for back of fobs
  • Sharp needle and thread
  • Cutting mat, ruler, rotary cutter, fabric scissors and craft scissors
  • Trims for hangers
  • Good eyesight or good glasses!

supplies for woolly fobs finishing tutorial - october house fiber arts tutorials

PREPARE THE PIECES

  1. Stitch all 4 designs and press.
  2. Using the templates provided, cut 2 of each from comic book board and 2 of each from batting. 

tracing the templates - october house fiber arts tutorials

  1. Using the cardboard shapes as a guide, trim each design to the shape of its template, leaving about 1/2" to 3/4' allowance around all edges. You don’t have to be precise about this, just roughly trim it to the general shape of the template.

centering the design - october house fiber arts tutorials

trimming the linen - october house fiber arts tutorials

  1. Now you’re going to make a little “sandwich” using your finished stitching, the quilt batting and the cardboard shape. It’s helpful to hold it up to the light and check that the design is centered and the fit pleases you. 

little sandwiches - october house fiber arts tutorials

Using a basting stitch, baste all around the stitching 1/8" to 1/4”  in from raw edge. I like to start at the bottom center and secure my thread with a knot and a small backstitch. (Remember, you’re going to be tugging on this thread in just a moment, so it needs to be secure!)

basting around the shapes - october house fiber arts tutorials

  1. Gently pull the threads to gather fabric around cardboard shape, smoothing linen as needed. Secure with a couple of small backstitches. This locks everything in place so you can continue on to the next step.

Repeat steps 3-5 for the back of the fob, using your backing fabric.

back gathered - october house fiber arts tutorials

LACING THE SHAPES

  1. Thread a sharp needle with a length of lacing thread. I like to use a hand quilting thread, since it’s usually glazed and has a lot of strength.
  2. I like to start in the center and lace toward each side. Anchor your thread and work back and forth, using even tension until you come to the edge. Take a couple of small backstitches to hold your stitching taut. Remember to check the front a couple of times to make sure your design is still centered.
  3. Continue lacing back and forth until you’ve worked all around the fob. Knot to end your thread.

basted and laced - october house fiber arts tutorials

4.  Fold an 8” length of trim or cording in half and tack to back of stitching, centering at top of design, using needle and thread and several tack stitches.

ready to sew together - october house fiber arts tutorials

ASSEMBLE THE FOB

Now you’re ready to sew the front and back together. Now is the time to get out your good eyeglasses (if you’re blind like me) and move to a nice, bright spot!

needlework eyeglasses - october house fiber arts tutorials

  1. Thread a sharp needle with a length of closely matching thread. (If in doubt, I like to match the linen color rather than the backing fabric color.) Anchor your thread on the wrong side of the backing shape.
  2. Hold the front and back pieces together, wrong sides together. If it helps, hold them together with a couple of clips. I usually just pinch them together with my fingers.

ready to whipstitch together - october house fiber arts tutorials

3.  Taking very small stitches (1/8" or less), whipstitch the pieces together all the way around. I tend to start at the bottom center.

the first stitch - october house fiber arts tutorials

whipstitching front and back together - october house fiber arts tutorials

You can see what a nice, neat edge you get when you make the stitches small, even and regular. 

4.  When you get back to the beginning stitches, overlap them with a couple of stitches.

5.  Bury and secure your thread by running your needle in between the front and back twice. You can see here, where I’ve inserted my needle at the center of the fob and run it out to the edge.

securing the thread - october house fiber arts tutorials

I’ll do this once more and then send it to the middle back to cut the thread:

ending the thread - october house fiber arts tutorials

almost done - october house fiber arts tutorials

And that’s it! You’ve got a fully finished fob!

a finished fob! - october house fiber arts tutorials